


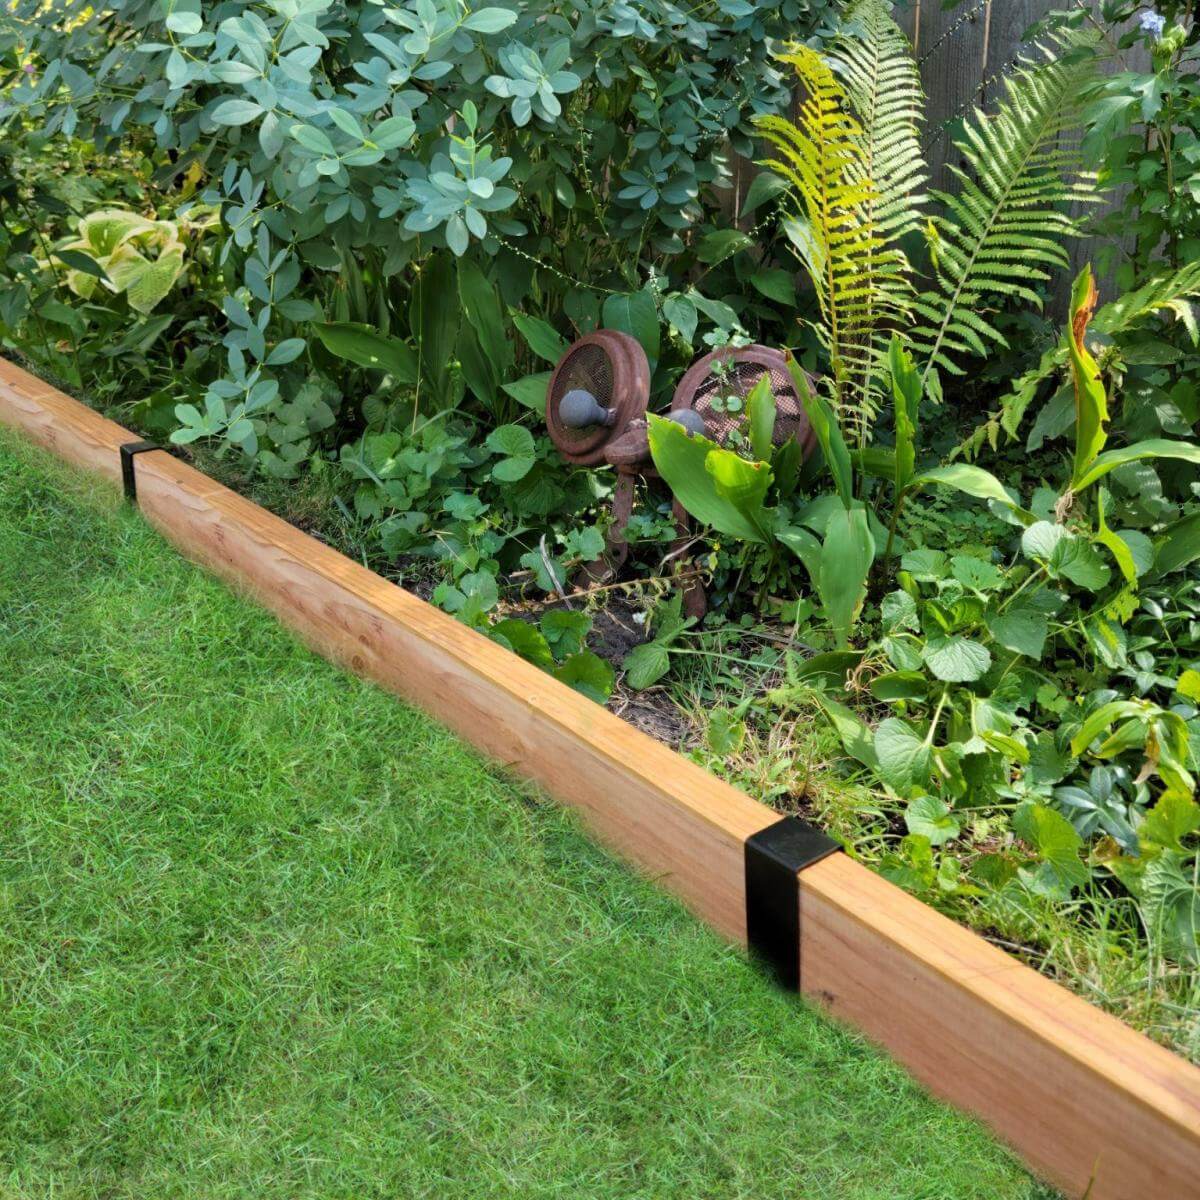


Typical Edging Projects
(Installing one or more boards in a straight line - eg., to make a long border between grass and mulch/gravel? Close this window and try the calculator.)
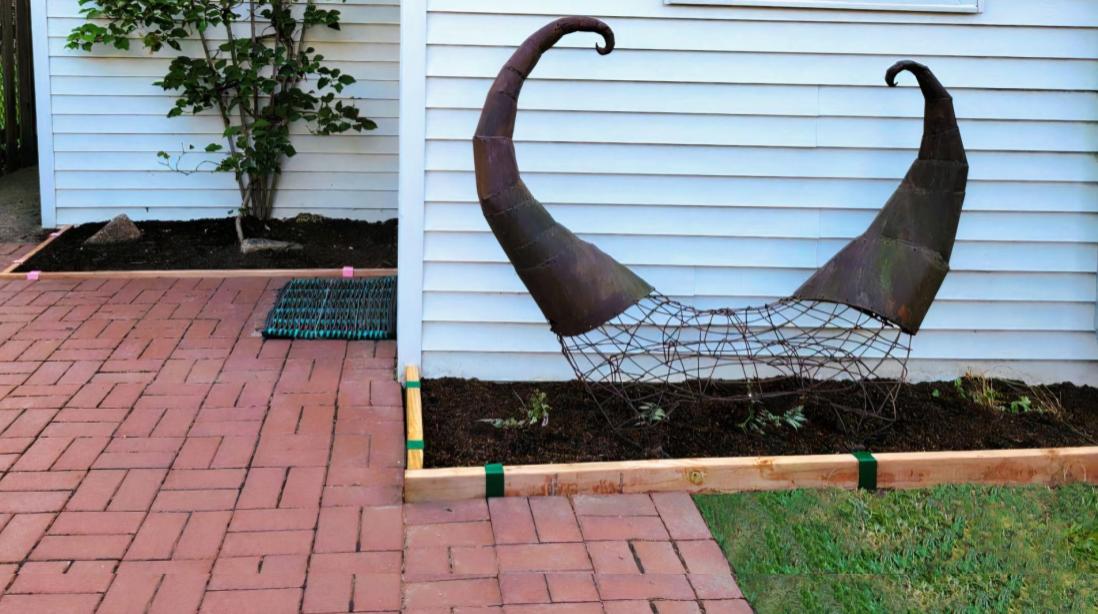
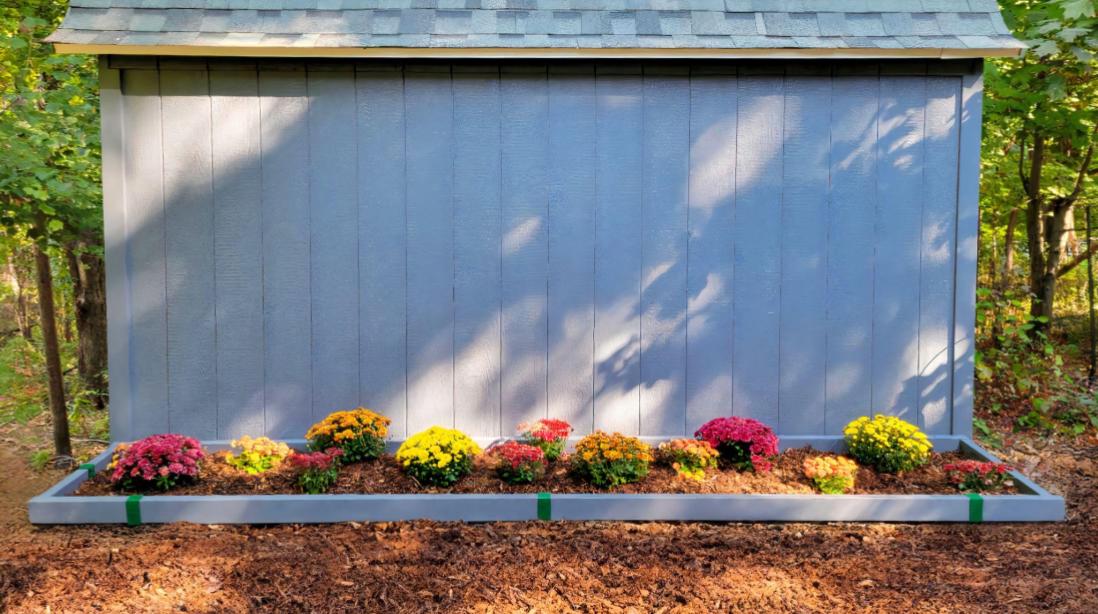
6 STAPLES: THREE-SIDED BED
To make a three-sided bed, such as a flower bed on the side of your house, use three boards and six 2xEDGE Staples.
Install a staple six to twelve inches from the ends of each board and use a simple butt joint at the corners.

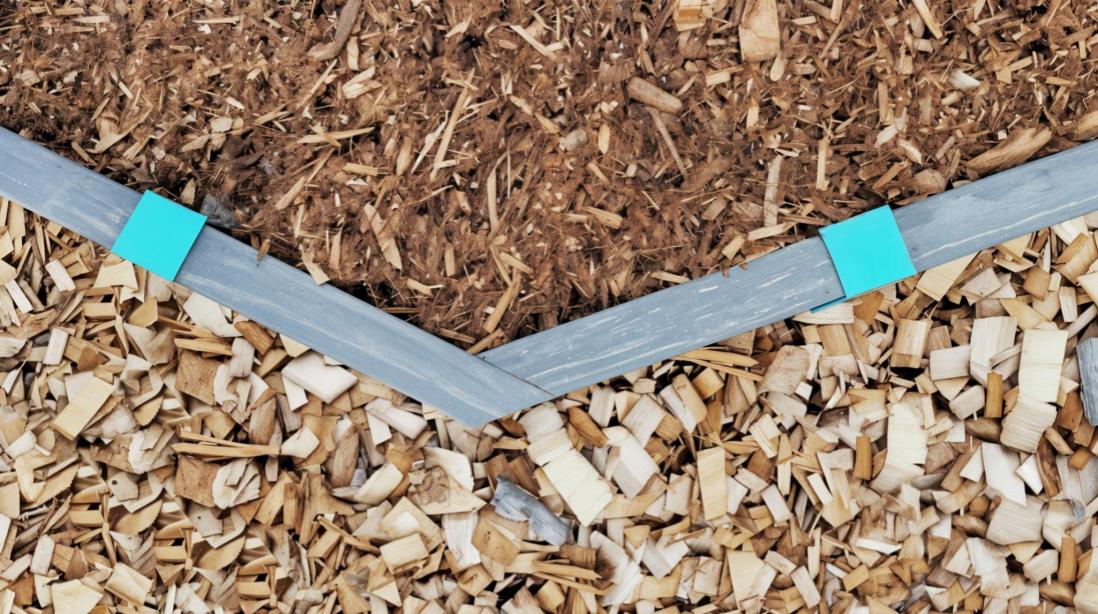
6 STAPLES: ZIG-ZAG BORDER
Making a zig-zag border using three boards and six 2xEDGE Staples is a straightforward project you can accomplish with off-the shelf lumber.
Install a staple six to twelve inches from the ends of each board and use a simple butt joint at the corners.

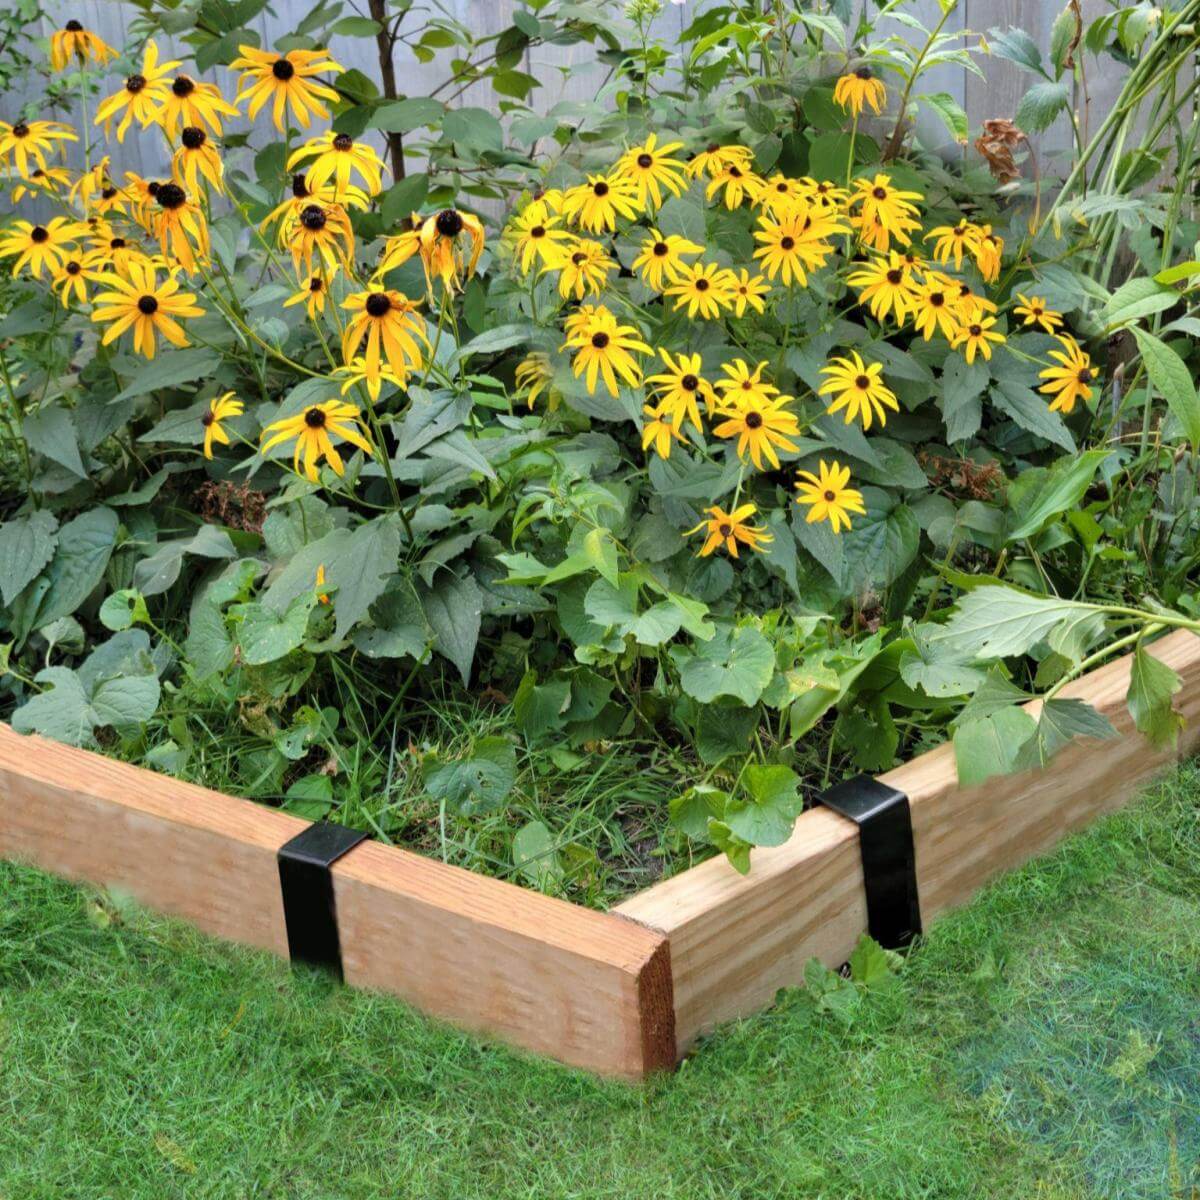
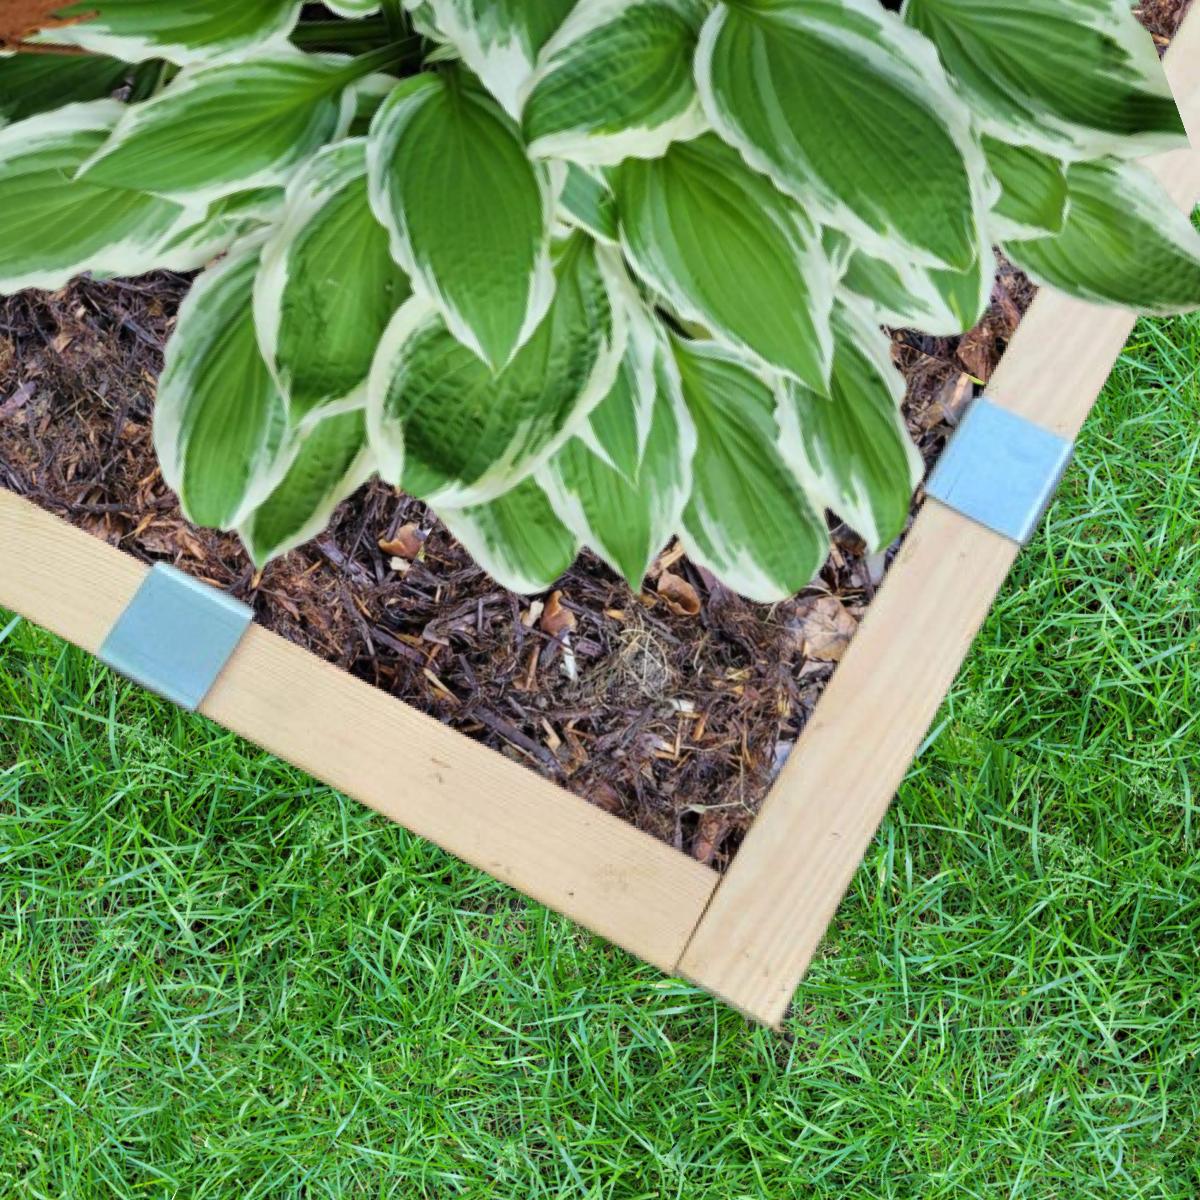
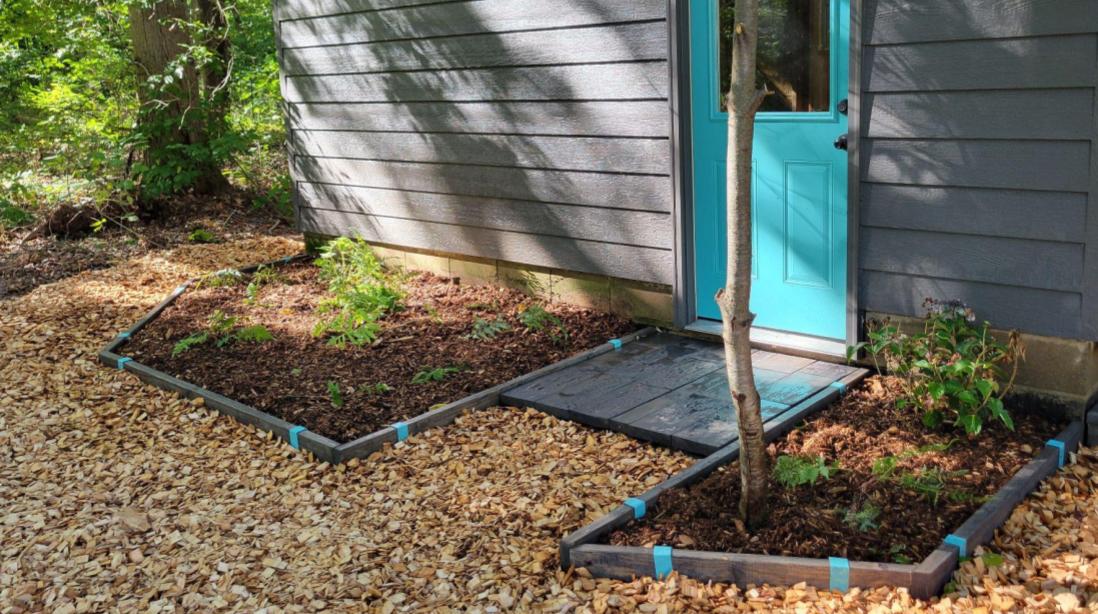
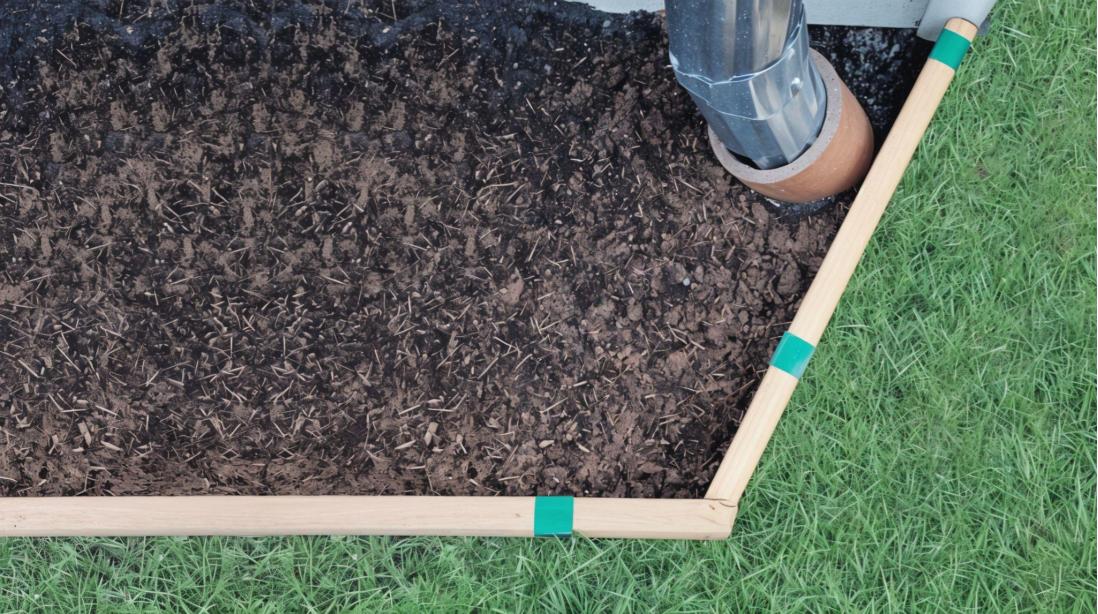
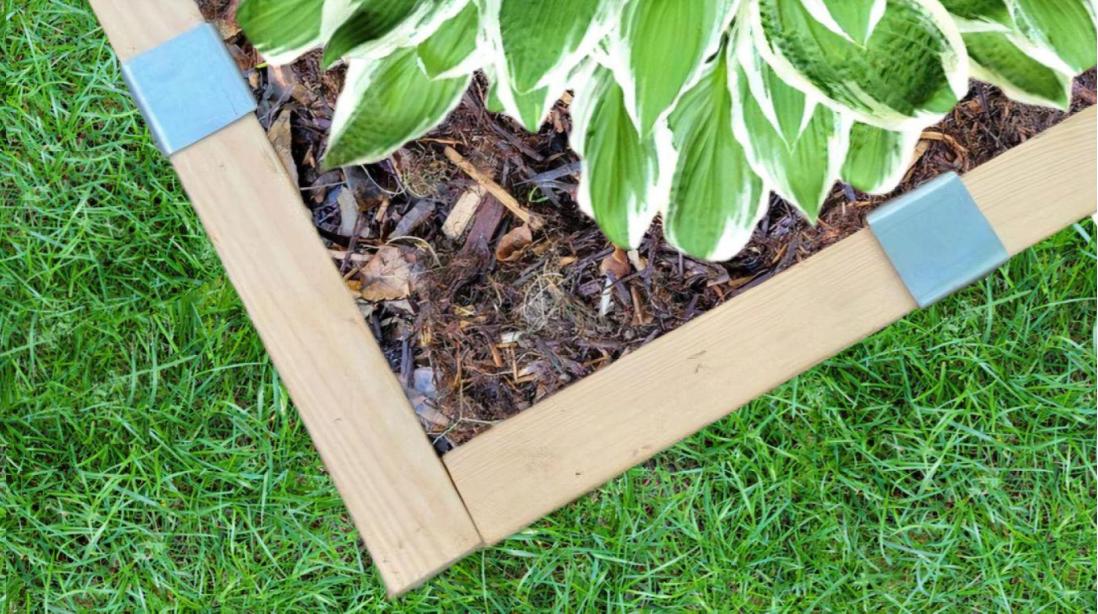
EIGHT STAPLES: SIMPLE FOUR-SIDED BED
To make a four-sided bed, such as a square or rectangular flower or vegetable garden bed, use four boards and eight 2xEDGE Staples.
Install a staple six to twelve inches from the ends of each board and use a simple butt joint at the corners.

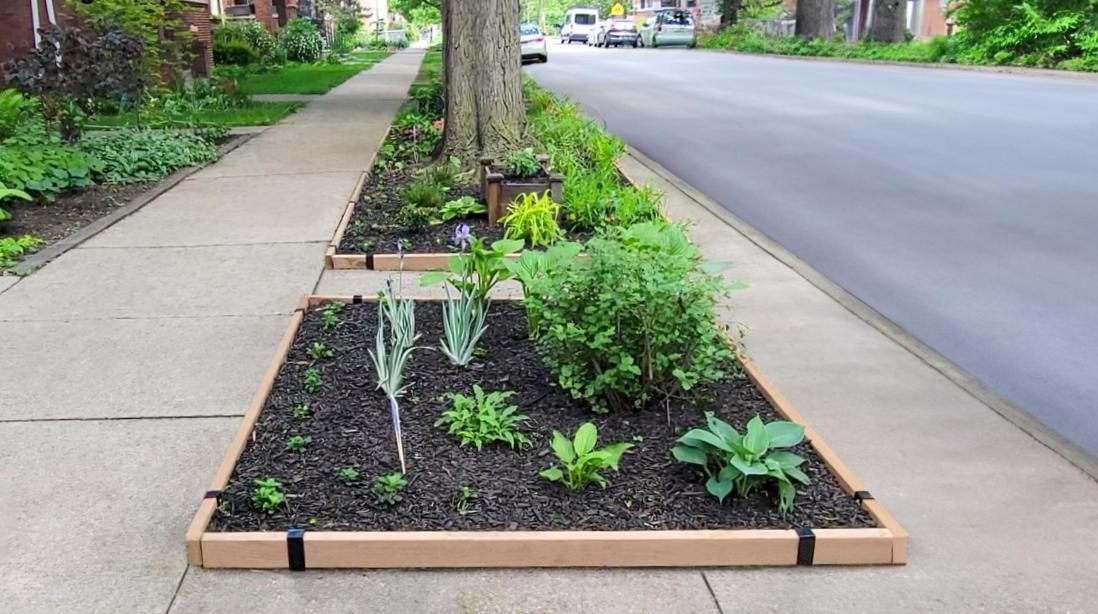
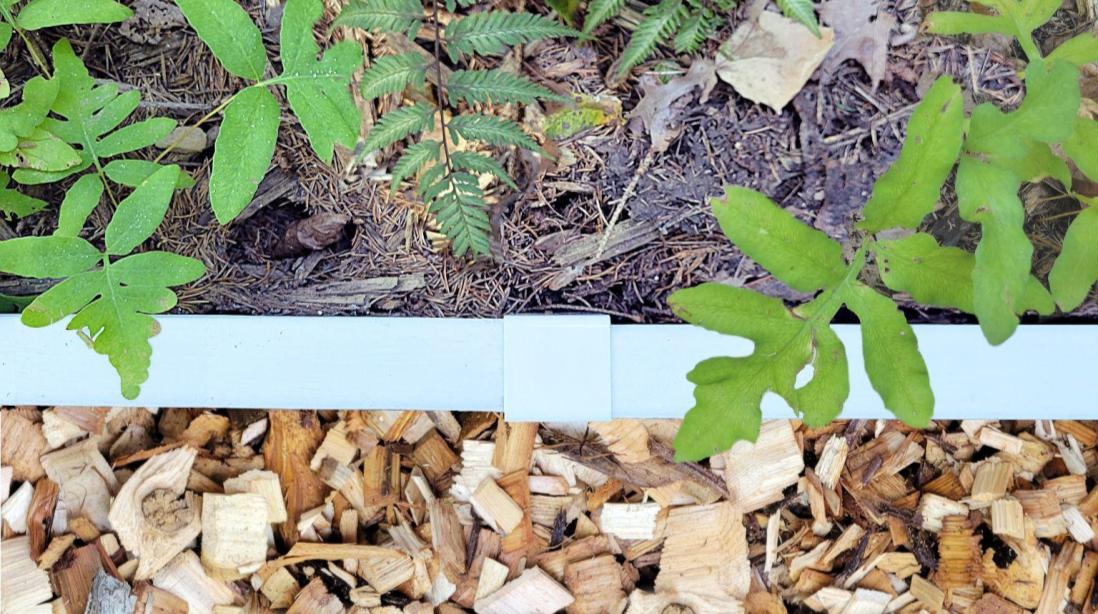
EIGHT STAPLES: WALKWAY EDGING
To edge a walkway use four boards and eight 2xEDGE Staples.
Once you determine the angle you need to use at the bend in your walkway, make angled cuts on one end of each board.
Layout your boards so that your angled cuts are aligned and then install a staple six to twelve inches from the ends of each board.

10 STAPLES: EXTRA WIDE FOUR-SIDED BED
To make a four-sided bed that is up to 10-feet by 20-feet, use six boards and ten 2xEDGE Staples.
Install a staple six to twelve inches from the ends of each board, and one over the seam where the boards meet. Use a simple butt joint at the corners.

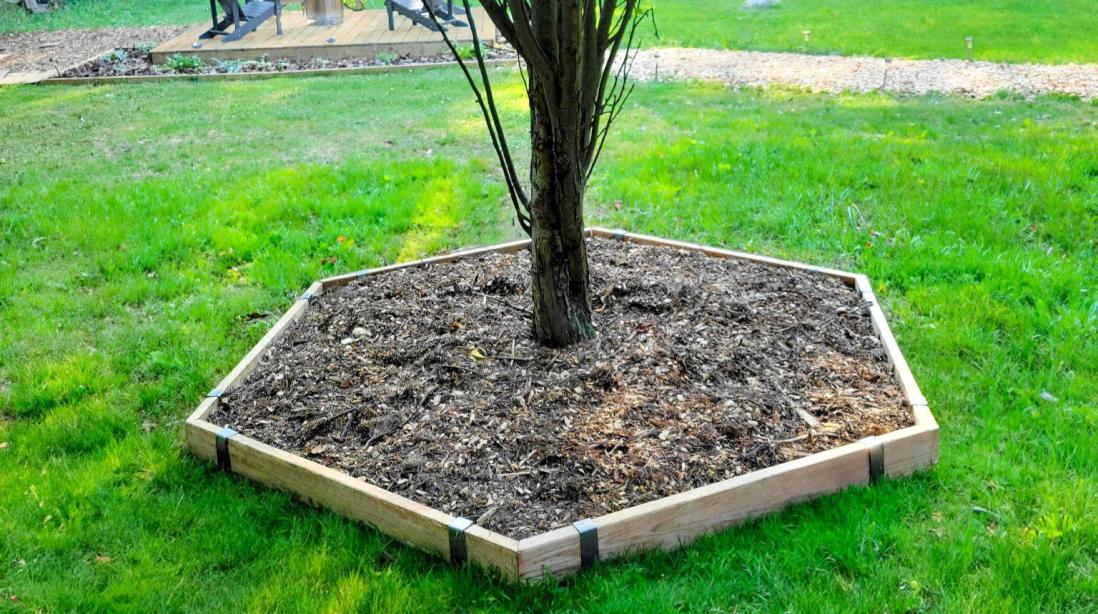
12 STAPLES: HEXAGON SHAPED BED
To make a hexagon shaped bed, such as a tree surround, use six boards and twelve 2xEDGE Staples.
Cut your lumber at a 30-degree angle on each end and install a staple six to twelve inches from the ends of each board.

TO USE LUMBER LONGER THAN 10-FEET
This 15-second long video explains how to use 2xEDGE Staples with lumber that's over 10-feet long.
Installation requirements
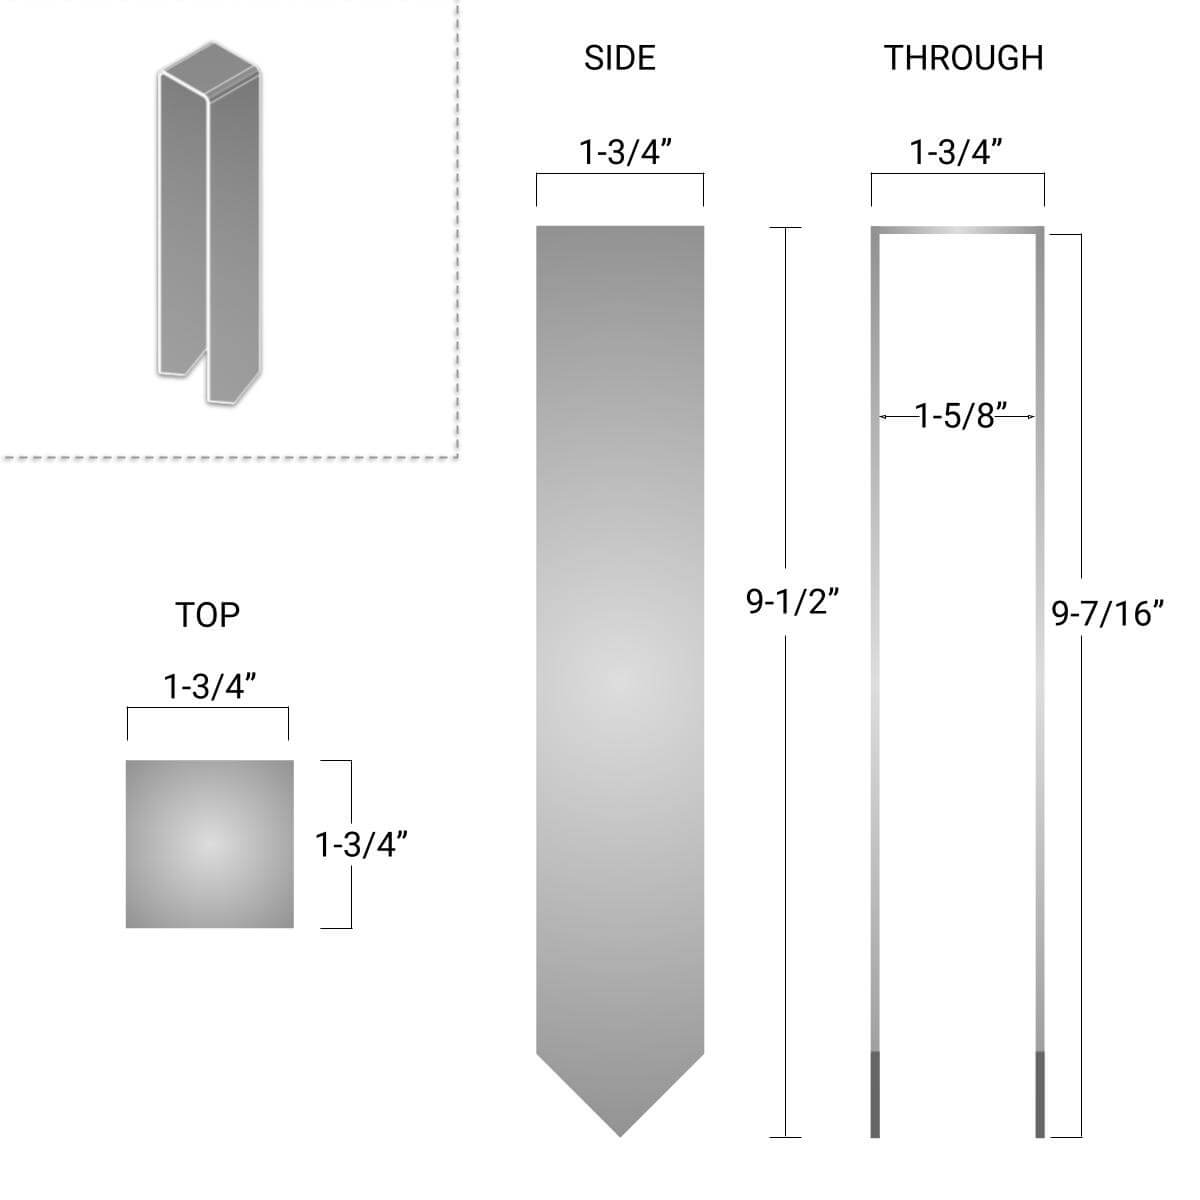
Specs

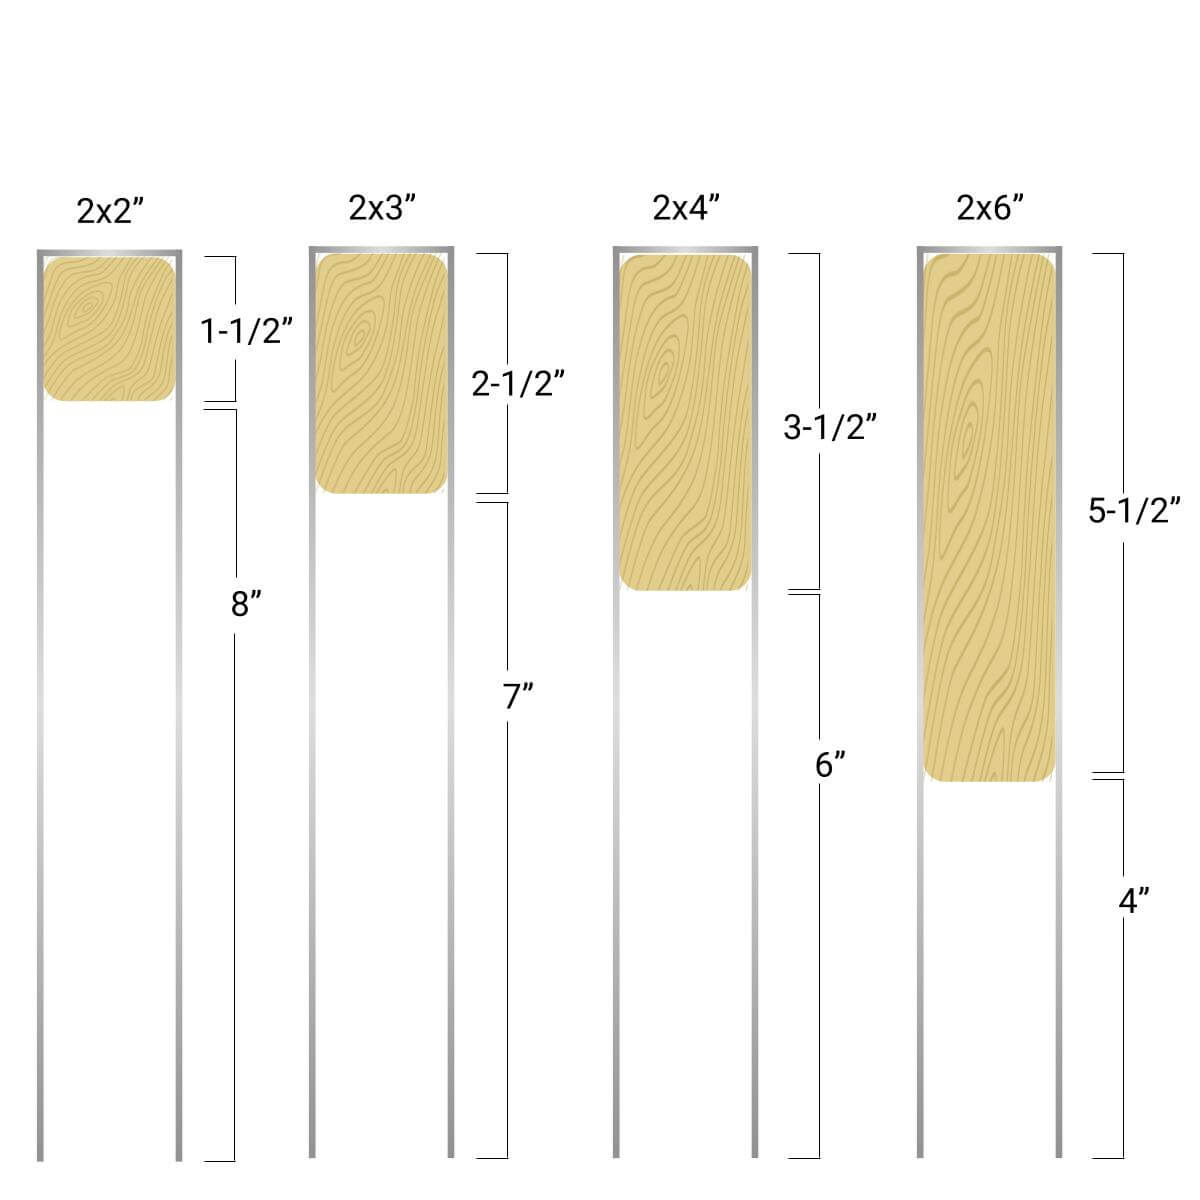
Works with two-by lumber up to 2x6"
Common lumber options:
2x2 (actual size: 1-1/2” x 1-1/2”)
2x3 (actual size: 1-1/2” x 2-1/2”)
2x4 (actual size: 1-1/2” x 3-1/2”)
2x6 (actual size: 1-1/2” x 5-1/2”)
Common two-by lumber lengths: 4', 6', 8', and 10'.
10 Reasons to Choose 2xEDGE
-
1. Garden edging you can customize.
2xEDGE works with any type of lumber - wood, composite wood, recycled plastic. Use lumber off-the-shelf or cut it to your exact needs - whatever works for you.
-
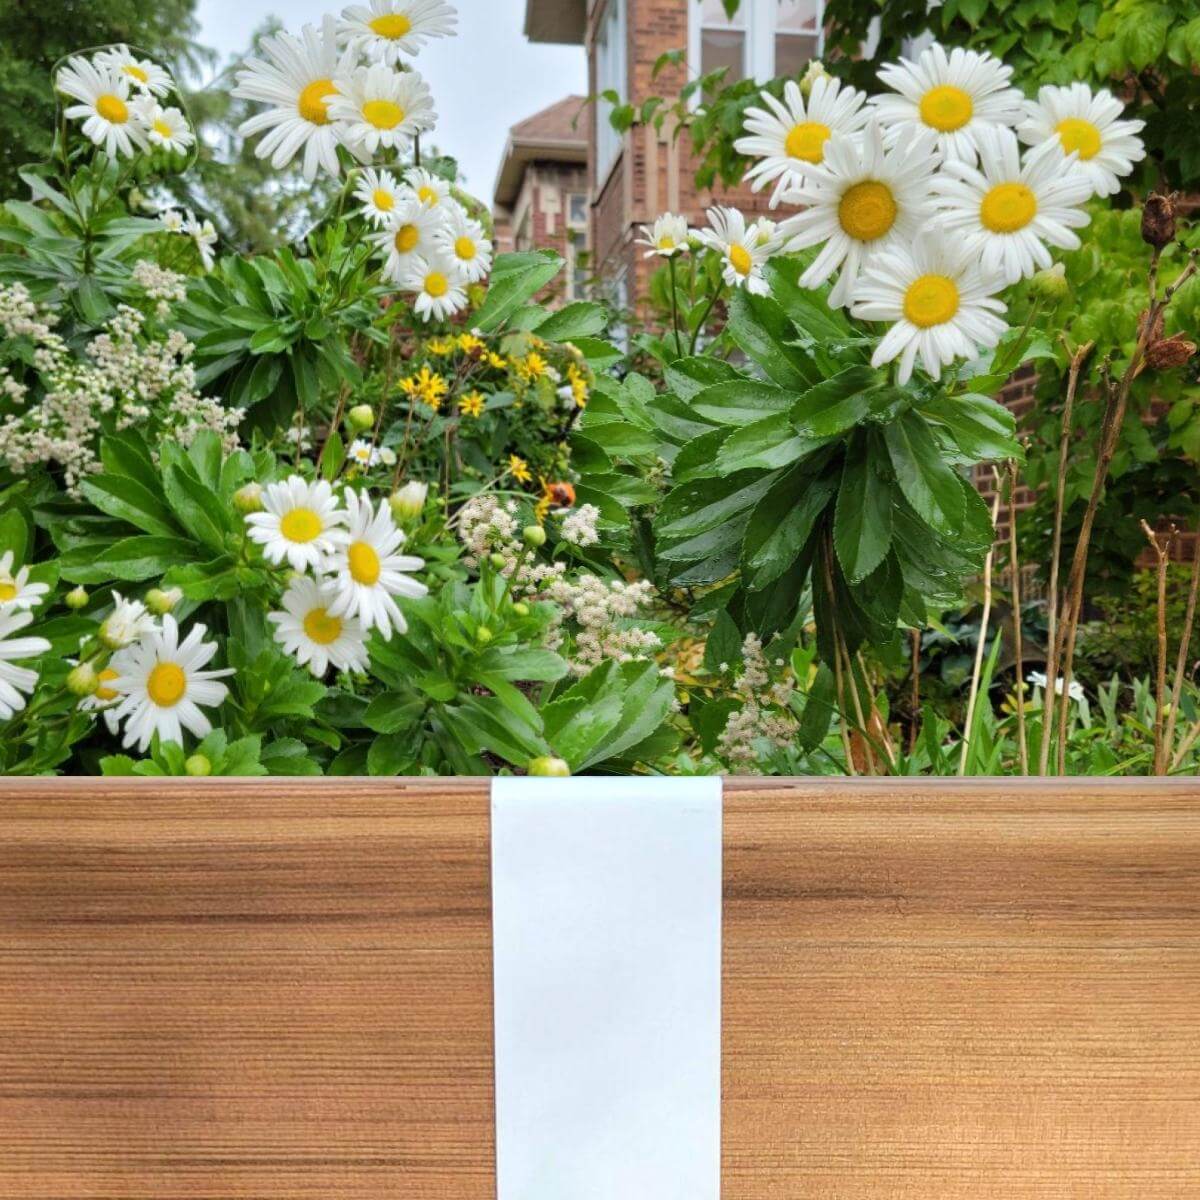
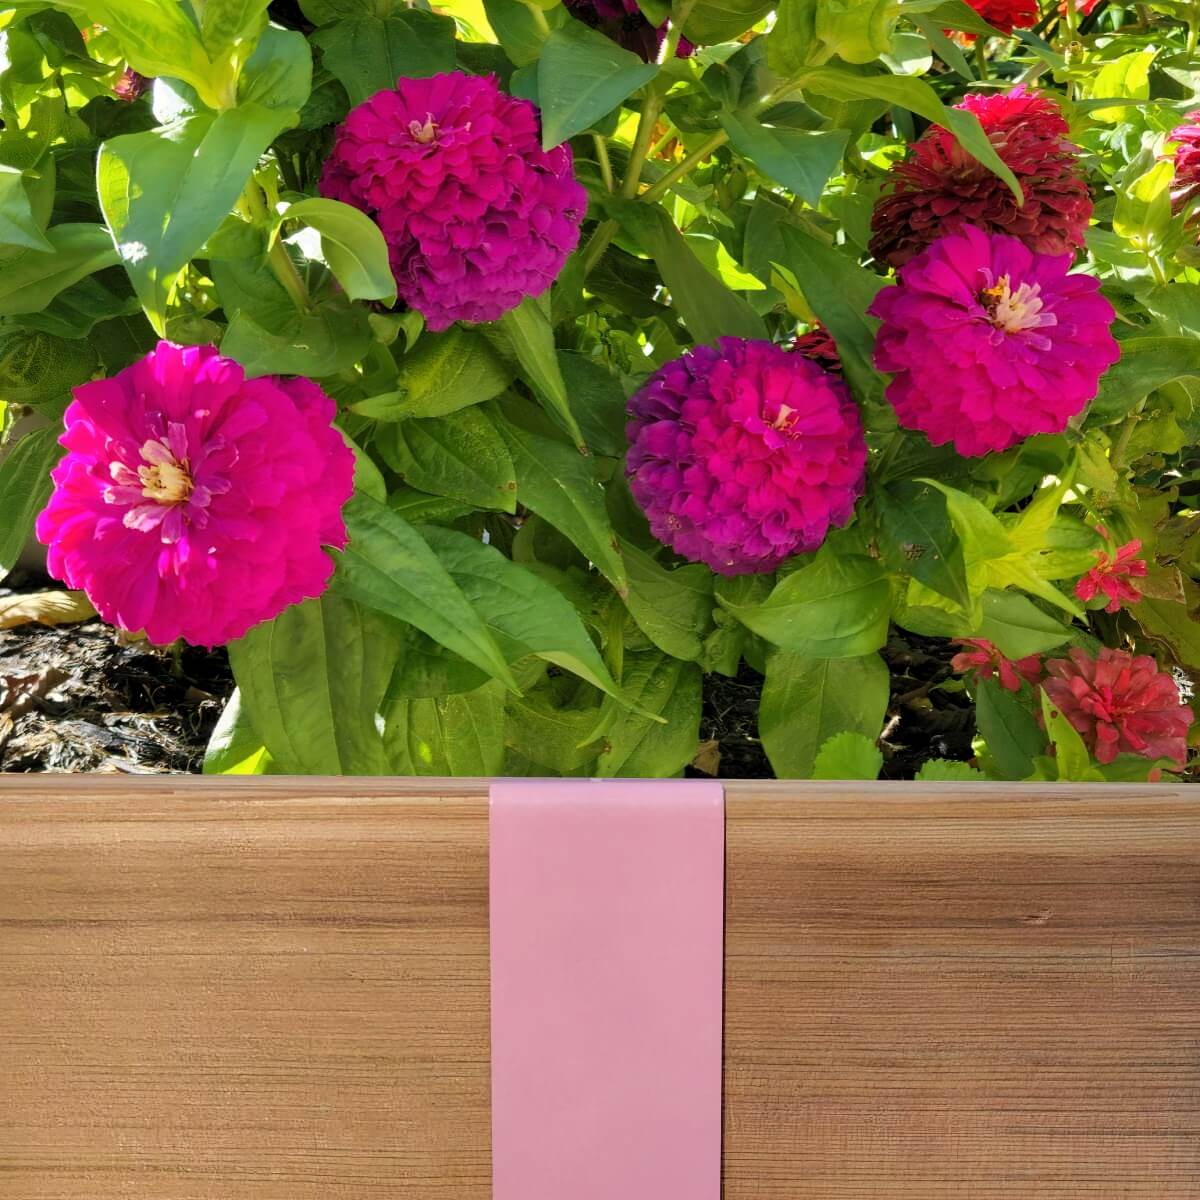
2. Edging that lasts longer.
2xEDGE wraps around lumber, keeping it intact and free of holes that can weaken it. Wrap your lumber in 16 gauge steel and make long lasting edging.
-
3. Edging that stays put.
2xEDGE is four times wider than a standard landscape nail. You get four times more grip so your edging stays where you want it.
-
4. Edging that won't tip over.
2xEDGE straddles lumber, fastening it to the ground on both sides. You get two times more stability than a nail and your edging stays upright.
-

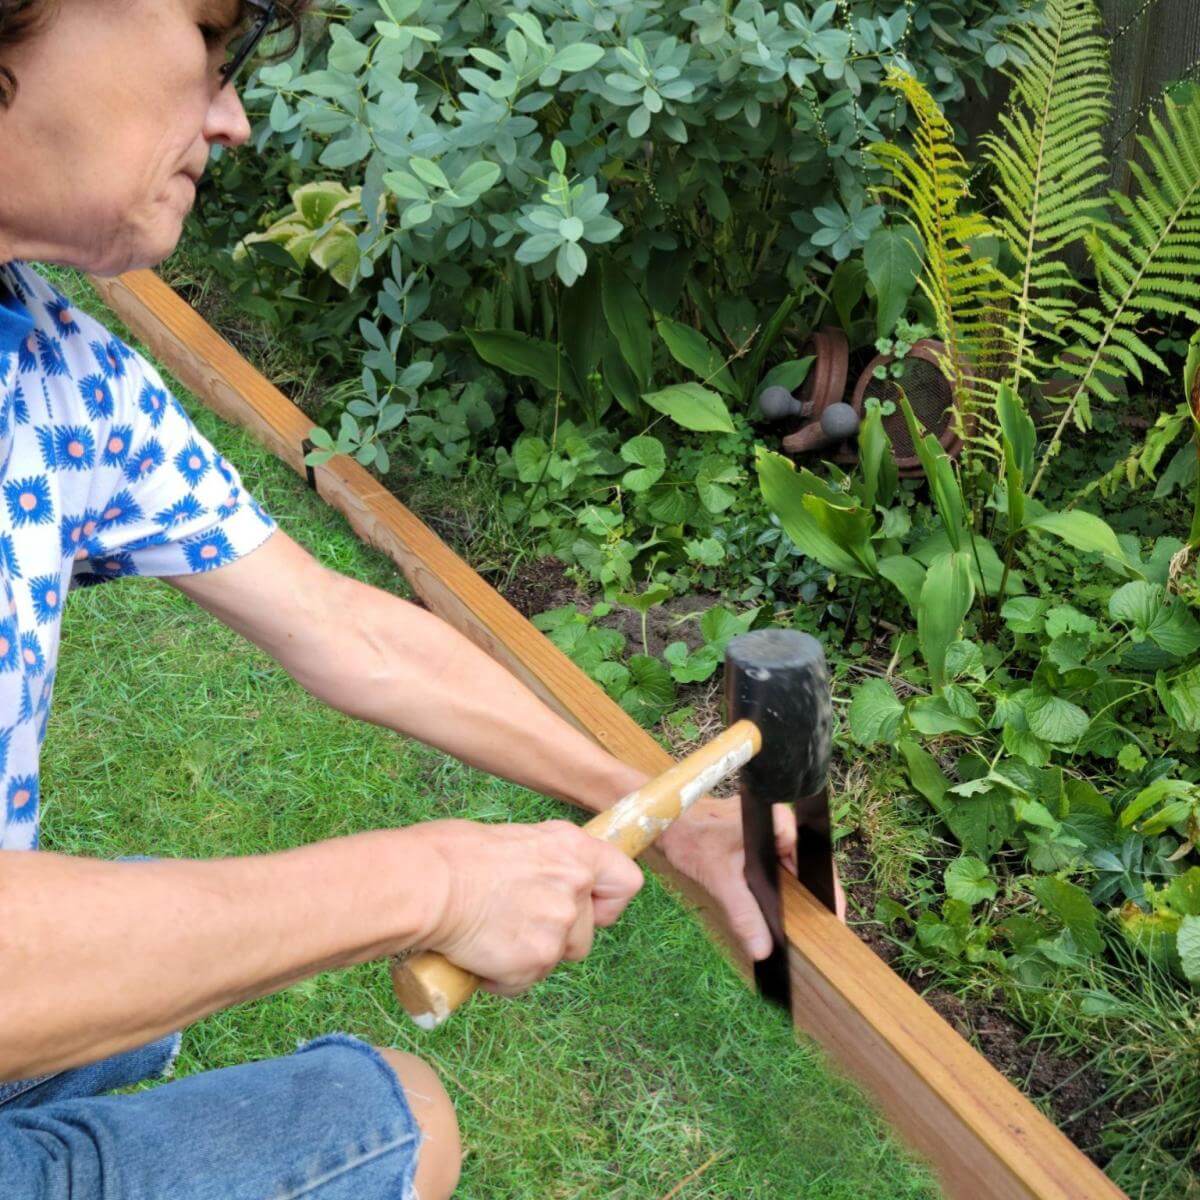
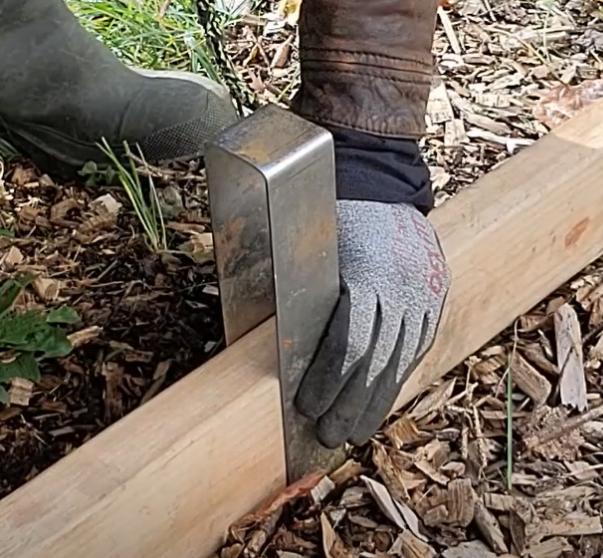
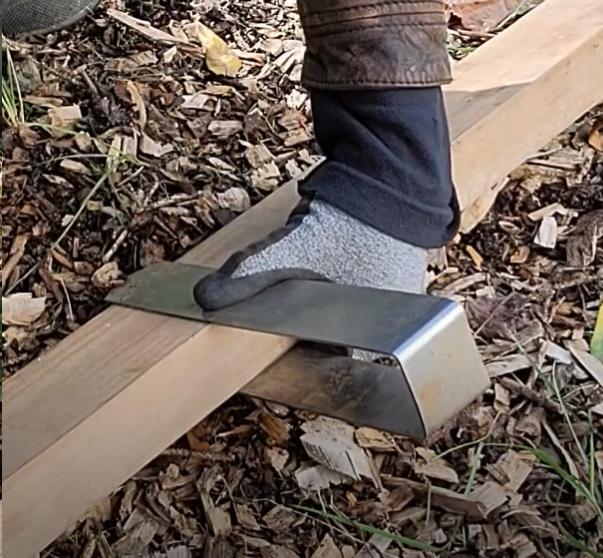
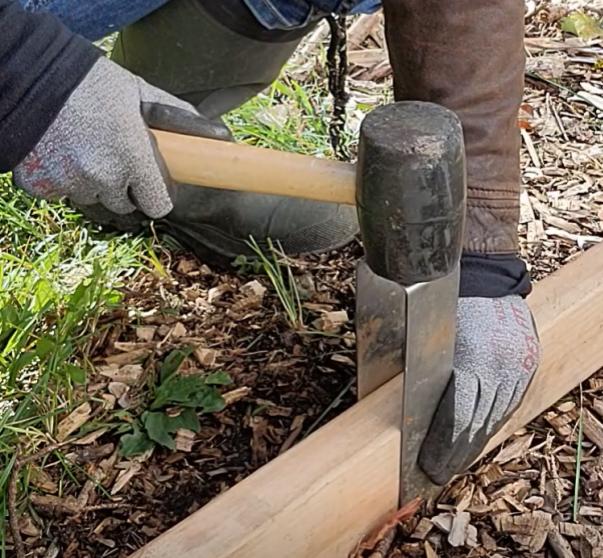
5. Edging that's fast & easy to install.
2xEDGE requires just one tool - a rubber mallet - to transform lumber into edging. And no digging or drilling means even less work for you!
-
6. Edging that's easy to extend & repair.
2xEDGE holds each piece of lumber independently to the ground. You'll have modular edging that's easy to add to and maintain.
-
7. Edging that's easy to reposition & reuse.
2xEDGE doesn't require that you dig a trench to install your lumber. Need to change up your edging? Just pull it up & move it - without leaving trenches all over your yard.
-
8. Edging that's eco-friendly.
2xEDGE works with natural woods like pine, cedar, and redwood. Choose sustainably harvested lumber and create Earth-friendly edging.
-
9. Edging that offers more utility.
2xEDGE stands lumber upright above ground giving you up to 6-inches of edging. Bonus: wood edging stays drier and lasts longer because it's installed on - not in - the ground.
-
10. Edging that's unique.
2xEDGE lets you easily use the substantial yet streamlined profile of two-by lumber in your landscape. You'll make edging that's distinctly different from typical landscape lumbers like railroad ties and landscape timbers.


About 2xEDGE
Founded in 2021 and headquartered in Chicago, Illinois, 2xEDGE LLC manufactures and sells 2xEDGE Staples, the company's flagship landscape edging product.
2xEDGE Staples are an innovative approach to easy landscape edging and garden borders made of wood. With 2xEDGE, anyone can transform common two-by lumber into long lasting wood edging in minutes with just a rubber mallet. No digging or drilling is required.
Have a question or need support? Please don't hesitate to contact us Monday-Friday 9am-5pm CST via chat on our website or by phone at 773-548-2653. Or email us anytime at hello@2xedge.com.